
Drogger GPS provides mock provider service for using DG-PRO1 with Google map and other GPS applications via Bluetooth communication.
When the mock provider service is enabled, other Android app automatically receive location information of DG-PRO1 instead of built - in GPS. *1
- Roles
- Preparation
- How to use
- Enable NMEA Message (Version 1.6.30 or later)
- Display items
- Settings
- A-GNSS
- Other information
- Information for developers
Roles
- Bluetooth connection, disconnection, communication
- Mock provider service to make location information of DG-PRO1 available to other applications instead of built-in GPS
- Display of reception status of DG-PRO1 (location , satellite status, location tracking on the map)
- Logging of received data of DG-PRO1
- Receiver setting of DG-PRO1
- Output of NMEA message
Preparation
Enable developer options of Android
- Go to Android Settings > System > About phone > Build number.
- Tap Build number seven times.
- Once activated, you will see a message that “You are now a developer!”

Select mock location app
- Go to Android Settings > System > Developer options.
- Tap > Select mock location app.
- Select "Drogger GPS".

Pairing with DG-PRO1
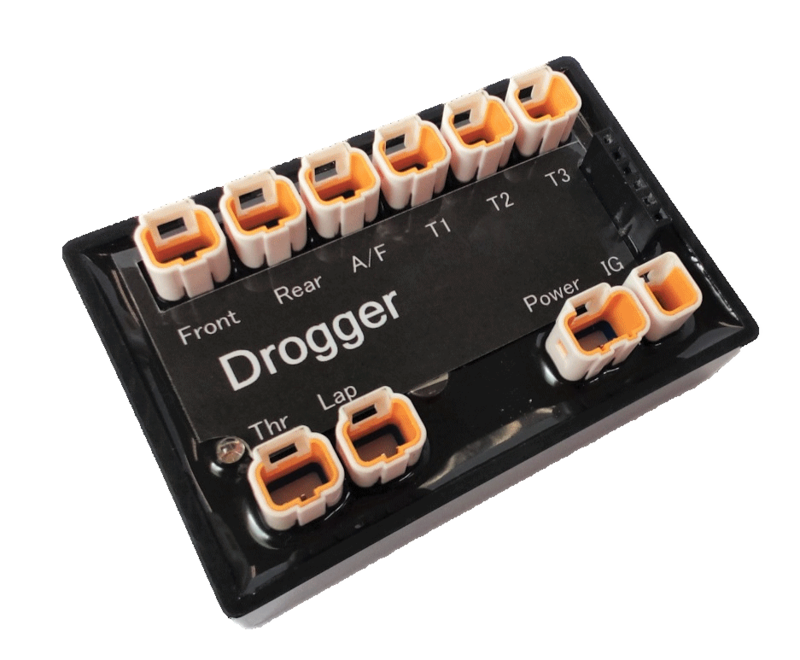
Pair with DG-PRO1 using the Bluetooth setting of Android. DG-PRO1 is displayed as the device name "DROGGER-GPS".

How to use
Starting service
- Starting Drogger GPS app. Multiple permissions are required at initial startup. Select All [Allow].
- Tap ▼ under the [Select device] and select [DROGGER-GPS] from the paired device list.
- Tap [OK].
- Tap [Start] to start Bluetooth connection.
- When the connection is complete, a green mark
 will appear on the right side of [Bluetooth] to indicate that the connection has been established.
When starting for the second time or later, the last connected device is automatically selected automatically.
Stopping service
- Start Drogger GPS app.
- Tap the [Stop] button to disconnect the Bluetooth connection and terminate the service.
Bluetooth communication status
It is possible to see of Bluetooth communication status.
The graph next to the connected mark indicates the amount of data existing in the receive buffer. If this increase continues, it indicates that the data processing will not be in time. There is no problem to increasing or decreasing the green range. Yellow / red is a sign of over flow. (However, it does not matter if it changes to yellow or red immediately after a setting change or connection)

[Msg Err/Total]shows the total number of messages received and the number of messages that detected data inconsistency (checksum error). Some errors are detected immediately after changing the settings or connecting, but it is normal if it is less than 0.5% after 1 hour. If it is more than that, check or take the following actions.
- Device Bluetooth failure
- Whether there is anything that emits strong 2.4Ghz radio waves in the vicinity (WiFi is also 2.4Ghz), or is it too far from DG-PRO1 (RW)
- Reduce update rate or selected GNSS
- Turn off the display of Satelites (a lot of data will receive in the display of Satelites)
- If NMEA is being output, turn off unnecessary message types (usually GGA, RMC, VTG may be used)
- Check if other Bluetooth processing is in progress on the Android terminal (Please delete unnecessary paired devices)
Background service notification
Communication between Drogger GPS and DG-PRO1 is done in the background. Unnecessary to bring the Drogger GPS to the front or to display the screen. If it is running in the background, "Drogger GPS Location service" will be displayed in Android notification area.

Logging (Version 1.6.27 or later)
Logging can record the position information etc. of DG-PRO1 under the following conditions.
| Item | Description |
|---|---|
| Log format | You can choose from 4 types: None / CSV / GPX 1.0 / GPX 1.1 format. The default is "None".The 1.0 format of GPX 1.0 / 1.1 depends on the app that analyzes this data, the 1.0 format can record compactly |
| Save speed and direction | Also save speed and direction in addition to the location information |
| Save accuracy | Also save accuracy information in addition to location information |
| Speed filter(km/h) | Do not record log records when the speed is below the specified speed. |
| Frequency of logging | Specify the time distance of log recording."All measurement data" is the same as the update rate. |
| Maximum a log size(MB) | Specify the maximum size of one log in MB.When it becomes larger than this it will automatically be recorded in a new file |
| Size of log space(MB) | The log takes unlimited disk space. By specifying this size you can delete it automatically from the old log. |
Details of logging
- In CSV format, a new file will be created each time Bluetooth connection is made.
- In GPX format, a new track segment (Trkseg) is started each time Bluetooth connection is made.
- In GPX format, a new file will be created at the time of service start.
- When using the automatic reconnection function, service Start and Bluetooth connection are not paired.
- When reaching the maximum size of one log, a new file is created regardless of format.
- When creating a new file, the size of the log area is checked and old logs are deleted as necessary.
- The file name is automatically generated in the format of [date_time.format].The saved folder is displayed on the [Log List] windows.
- Logs can be performed regardless of whether Mock service is enabled or disabled.
- The unit of speed is m/sec in either format.
Estimated logging size
Estimated time to record to 1 MB size. It is shown for each format of full information.
When recording at 10Hz
| Format | Time |
|---|---|
| CSV | 16 minutes |
| GPX1.0 | 7 minutes |
| GPX1.1 | 6 minutes |
When recording at intervals of 1 second
| Format | Time |
|---|---|
| CSV | 160 minutes |
| GPX1.0 | 70 minutes |
| GPX1.1 | 57 minutes |
View log
- Tap ... and tap [Log list].
Delete and share logs
- In the log list window, long tap the log.
- Tap the log you want to delete or share and check mark. (Multiple selections possible)
- Tap the trash or share button on the action bar.
- In the case of sharing, select the app to share.
Enable NMEA Message (Version 1.6.30 or later)
You can enable it for apps that require NMEA messages. Use TCP connection to other apps or use direct Bluetooth connection with other apps.. (eg. AgriBus-NAVI, etc.) (It does not need general Android's app of using GPS. )
The message to be sent is as follows. Each message can be individually set ON/OFF
| Item | Description |
|---|---|
| NMEA type | GGA, VTG, RMC, GSA, GSV, GLL |
| Update rate | GLL, GSV, once per second. Other, the same as the update rate |
Output settings
The following settings are available in [NMEA data output] of app settings.
| Item | Description |
|---|---|
| Output service type | None (default). TCP client (This app is TCP client.) |
| Host | Specify the IP address or host name of the server on which the TCP server is running. |
| TCP port | Specify the port number on which the TCP server listens. |
Connection operation
First, if the TCP client is enabled on the output service type, the NMEA message of the receiver will be enabled when the Bluetooth is connected. Next, I try to connect to the server.Once connected, send NMEA message to TCP server. If the TCP connection is inadvertently disconnected, try reconnecting every 100 milliseconds.
Display items
Header area
From top to bottom,
| Item | Contents |
|---|---|
| Device name | Bluetooth GPS device name |
| 1.x.xxx | This app Version |
| Bluetooth status | Bluetooth connection status and status display |
| Update rate | Number of times location updates in 1 second (real measured value) |
| Mock xxxx | [Enabled]DG-PRO1 Location data is used for other app [Disabled]DG-PRO1 Location data is not used for other app |
| Power mode | Power mode of the receiving module |
| Logging ... or No logging | Indicates the operation status of logging data |
Receiver Version
Displays the internal software version of the receiving module. Switchable ON / OFF with right switch
Navigation
Displays location data (longitude, latitude, speed, direction, accuracy, number of satellites used etc.). This value displays the original value received from DG-PRO1.
Regardless of the measurement rate of DG-PRO1, the value is updated every 1 second.
Fix Mode
The meaning of Fix Mode is as follows.
| Display | Meaning |
|---|---|
| No Fixed | Location can not be fixed |
| 2D | Horizontal position fixed |
| 3D | Horizontal and vertical position fixed |
| Time only | Watch only fixing |
The following string are appended according to the state after the above status.
| String | Meaning |
|---|---|
| DGNSS | Differential correction data by SBAS and RTK is used |
| FLOAT | RTK is the FLOAT mode |
| FIXED | RTK is FIX mode |
In addition, RTK (real-time kinematic) is not supported by DG-PRO1. It is prepared for the future.
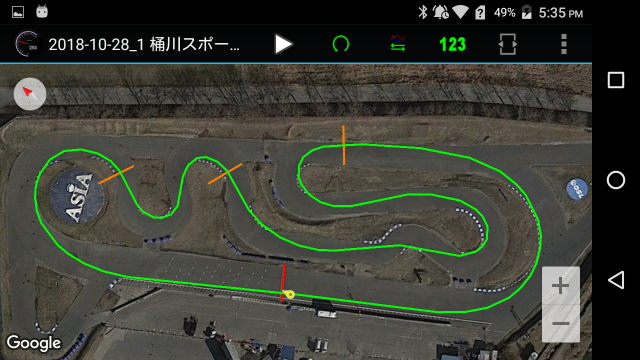
Map
Show location traces on Google Maps. The number of points to be displayed is 1800 points. If it exceeds 1800 points, it will be removed from the old one.
For example, If the update rate is 10 Hz, it is 600 data per minute, so it will be a locus for 3 minutes.
The Compass is displayed in the upper right corner of the map*2, The compass only works when the GNSS has direction information, and does not indicate the correct direction if it has not been moved.
The optional "built-in sensor compass" works only when Bluetooth is in communication. When the built-in sensor compass is enabled and Bluetooth is in communication, it indicates the direction (with Android's compass accuracy) even if it is stationary.
Tap the compass to toggle whether the needle or scale rotates. Also, long press will reverse N/S. N/S reversal is provided when you need to landscape the device when upside down .
Turn on the Picture switch to display the satellite picture of Google Maps. Turn OFF, the standard map mode is set.
Therefore, when Mock Enabled , it is the location data of DG-PRO1. In the case of Mock Disabled , the built-in GPS will be used.
Satellites
Graphically display the satellite information received by DG-PRO1.
This information is updated once per second (from after Ver 23 ) (Prior to Ver 22, it is updated once per 10 position updates), regardless of the update rate of DG-PRO1.

| Item | Description |
|---|---|
| SID | Satellite number Meaning of first character G:GPS S:SBAS Q:QZSS R:GLONASS E:Galileo B:BeiDou I:IMES Meaning of letters after numbers D:Differential correction data R:RTCM*3 MSLAS*4 |
| Azim | Satellite direction (North0° +Clockwise) |
| Elev | Satellite Elevation angle (Horizontal0° Just above90°) |
| S/N | Satellite Signal-to-noise ratio (Signal to Noise Ratio)(dBHz) |
Graph color
| Color | Meaning |
|---|---|
| ■ Green | Used to navigation |
| ■ Cyan | Normal receiving, but not used for navigation |
| ■ Yellow | Confirmed the signal but can not use it |
| ■ Red | Received a signal but can not check it |
Clear map trajectory
Tap the  icon at the top left of the map.
Settings
Explanation of the settings is in each item of the app, please see it.
The following is a supplementary explanation
Automatic reconnect interval
Specify the time (seconds) to try to reconnect to automatically when the Bluetooth connection is lost. If zero is specified, automatic reconnection is not performed. The default is zero.
When connecting to a car's power supply, and using it in navigation etc., the Bluetooth connection will be lost with the ignition OFF. After that, when it becomes possible to connect with the ignition ON, it will be connected automatically. Connection attempts are made on Android devices. It consumes Android's battery for too short a time. We recommend more than 30 seconds. Also set [Number of connection retries] to 1 or 2.
Automatic startup at boot
Used for car navigation systems that Android is shutdown by turning off the ignition. When this setting is turned ON, when Android is started (booted) with ignition ON, service starts automatically and Bluetooth connection is start.
App to be started after Bluetooth connection
You can specify a app to launch when Bluetooth connection is completed. Select from the list of apps on the your device. If launching of the app is unnecessary, select "NONE" at the top of the list.
Power mode
The power mode setting controls the power-saving of the receiver module. More bottom of the table, the more power-saving.
| Item | Description |
|---|---|
| Full power | Power saving is ineffective. |
| Balanced | Automatically save power within the range that does not affect measurement. |
| Cyclic tracking | Measure periodically. It is in standby state when saving power. |
| Power Interval | Power on regularly. At power saving, it is almost same as power OFF. |
For measurement / update rate, power saving setting takes precedence. For example Measure at 10 Hz, the power mode must be Full power or Balanced.
The setting of [Power mode - Screen off] can be used with any setting while Android screen is displayed. Conversely, if you want to continuously use the position information (even if the screen is off), select Balance.(Ex, Navigate Google Map with screen OFF, with voice guidance alone)
Update rate select and GNSS
Given the accuracy, it is better to have a lot of received satellites , but if you need a high update rate, adjustment is necessary.
Depending on the number of received satellites and the number of GNSS selections, there may be a delay in the CPU processing of the receiving module and the update rate may decrease. Adjustment is required according to conditions such as GNSS selection, minimum elevation angle of satellites and minimum signal level. Below is a selection example of update rate and GNSS.
| Update Rate | Select GNSS |
|---|---|
| 18Hz | GPS + SBS + QZSS |
| 10Hz | GPS + SBS + QZSS + (GLONASS or BeiDou)*5 |
| 5Hz | GPS + SBS + QZSS + (GLONASS or BeiDou) *6+ Galileo |
In addition to the above, reduce the number of satellites used and improve the update rate and accuracy by the following method.
Lowest satellite elevation angle
Filter the satellite using the elevation angle of the satellite seen from the receiver. Satellites located at angles smaller than the angle specified by the lowest satellite elevation angle are not used in navigation.
The accuracy is the best when the satellite is directly overhead (90 °). When angle is decreases, reflected waves reflected from buildings, mountains, ground, etc. will be more easily received. Reflected waves are degraded in accuracy because the route is different from the true distance.
In places where there are many buildings, increase this angle and increase the choice of GNSS, you can improve accuracy.
Minimum signal level
Filters the satellite using the received signal strength (S / N ratio). Satellites with signals smaller than the value specified for the lowest signal level will no longer be used in navigation.
By adjusting the update rate, GNSS selection, minimum elevation angle, and minimum signal level according to the usage of DG-PRO1, it is possible to set the accuracy to be improved while securing the necessary update rate.
Low speed Accuracy (Ver 1.9.51 or later)
At stationary and low speeds (10 km / h), there are two options to improve heading accuracy. Both options are reflected in both the mock provider and the NMEA output.
Stationary noise filter
If it is determined that it is stationary, updating of the location information is stopped to suppress the wandering at the time of stopping. Ideal for applications where you want to suppress wander at rest. The default is ON.
COG(Course over ground) low pass filter
The LPF (low pass filter) filters out sensitive direction changes into smooth direction changes. You can change the filter strength in the range of 1 to 5. The default is 3. It is optimized with an update rate of 10 Hz. If the rate is low, adjust to weaken.
Built-in sensor compass
You can enable the compass using the Android built-in sensor. This compass is valid only when stationary or back. If GNSS detects that it is forward moving, the compass value will not be used. The sensors used are gyros, accelerations, and magnetic sensors. Some devices do not have gyro sensors. Accuracy depends on conditions such as the sensor, mounting condition and ambient magnetic field of the device.
Devices that do not have gyro sensors may not display correctly depending on the orientation of the device. In such a case, it is recommended to turn it off.
When the device is mounted on a vehicle, the mounting and sensor errors can be corrected so that the direction indicated by the compass matches the forward direction of the vehicle. The correction value is added clockwise to the compass value. You can also enter negative values and decimals.
A-GNSS
A-GNSS is a mechanism to shorten the time from when the receiver is turned on until accurate positioning is possible.
Normally, the receiver receives its arrangement etc. from the satellite, but it can not be received properly in a bad radio condition, or it takes a very long time.
Drogger GPS receives the satellite's location information from the Internet *7 and sends it to DG-PRO1.
Satellite position information of GNSS enabled by setting will be transmitted when Bluetooth is connected,. If you change the validity / invalidity of GNSS, you can send the satellite position information of the newly enabled GNSS by stopping Bluetooth once and starting again.
Other information
Use DG-PRO1 with AgriBus-NAVI (Japanese)
Use DG-PRO1 with Car navigation apps (Japanese)
Information for developers
This information is for developers who create apps.
Service activation
By using the following code, you can start Drogger GPS service from your app.
Intent intent = new Intent();
intent.setAction("DroggerGpsService");
intent.setPackage("jp.bizstation.drgps");
if (Build.VERSION.SDK_INT >= Build.VERSION_CODES.O)
    startForegroundService(intent);
else
    startService(intent);
End detection of Mock Provider
When the Drogger GPS service terminates due to disconnection of Bluetooth communication,void onLocationChanged(Location location) will not be called.
This is the case also when the position can not be measured in a tunnel or the like, and it is necessary to make a judgment in other ways as to which situation it is.
Although there is no explanation in the Android API documentation, when the Mock Provider service terminates, the normal built-in GPS service is enabled,
void onProviderEnabled(String provider) will be called. The application can get location information by calling requestLocationUpdates again.
Enjoy with Drogger
Drogger's details and purchase; https://www.bizstation.jp/en/drogger/
*1:However, it is possible to know in each app whether it is information instead of built-in GPS.If there are some apps that do not use such information, in such apps DG-PRO1's Location information can not be used.
*2:Version 1.9.51 or later
*3:DG-PRO1 Not supported
*4:DG-PRO1 Not supported
*5:With hardware specifications, GLONASS and BeiDou can not be selected at the same time.
*6:With hardware specifications, GLONASS and BeiDou can not be selected at the same time.
*7:Only when Internet is available


